


Maintaining optimal water pressure (40-60 PSI) is crucial for preserving outdoor plumbing integrity, preventing leaks, and reducing fittings failures. Regular checks for noticeable drops in pressure or moisture around fittings are key to early leak detection. Using specific tools like a pressure gauge, garden hose, flashlight, and taking detailed notes aids in efficient leak identification. Visual inspections of pipes, fittings, valves, and faucet gaskets, coupled with regular maintenance and swift action upon detecting leaks, significantly minimize water waste and damage.
“Maintaining your outdoor plumbing isn’t just about preventing clogs; it involves a thorough understanding of water pressure and its impact on your system. This article equips you with essential knowledge to identify common signs of leaks in outdoor pipes, providing a step-by-step guide for effective inspection. Learn which tools are indispensable for the task and discover how to address different leak types. Additionally, explore preventive measures to reduce water pressure-related leakage, ensuring a robust and efficient plumbing system.”
- Understanding Water Pressure and Its Impact on Outdoor Plumbing
- Identifying Common Signs of Leaks in Outdoor Pipes
- Tools Needed for Effective Outdoor Plumbing Leak Inspection
- Step-by-Step Guide to Inspecting Your Outdoor Plumbing for Leaks
- Addressing Different Types of Leaks and Maintenance Tips
- Preventive Measures to Reduce Outdoor Plumbing Leakage
Understanding Water Pressure and Its Impact on Outdoor Plumbing

Understanding water pressure is crucial when inspecting outdoor plumbing for leaks. High water pressure can lead to damages and accelerated wear, causing pipes to burst or fittings to fail. It’s essential to check your home’s water pressure regularly, as persistent high pressure could indicate a problem with your water main or pressure regulator.
Outdoor plumbing is particularly vulnerable to the effects of varying water pressure. During peak usage times or due to unexpected surges, water pressure can spike, exerting immense force on pipes and connections. This can result in leaks, especially at joints and fittings where sealants may be compromised by sudden pressure changes. Regular monitoring and adjustments to maintain optimal water pressure—typically between 40-60 PSI—can significantly reduce the risk of outdoor plumbing failures.
Identifying Common Signs of Leaks in Outdoor Pipes
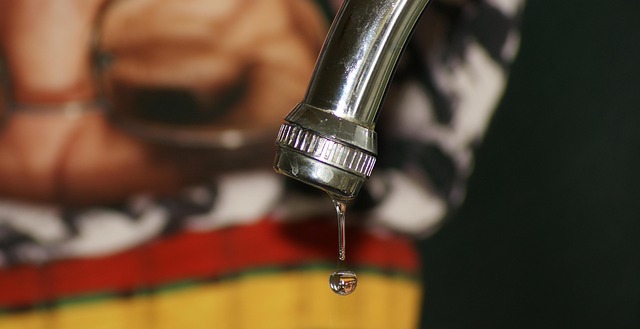
Identifying leaks in outdoor plumbing is crucial for maintaining efficient water distribution and preventing costly damage. Common signs include noticeable drops in water pressure, especially when using fixtures or appliances near the suspected leak area. This sudden reduction can indicate a rupture or break in the pipes beneath the surface. Additionally, keep an eye out for persistent puddles or moisture around outdoor fittings, such as faucets, sprinklers, or hoses. Over time, these areas may exhibit signs of wear and tear, with rust forming on metal pipes or discolored, soft spots appearing in plastic ones—all potential indicators of a leak.
Regular checks during routine maintenance can help catch leaks early, allowing for prompt repairs before water wastage becomes significant. In the case of underground pipes, where leaks might go unnoticed for longer, monitoring water pressure and visually inspecting visible sections of plumbing can provide valuable insights. If you suspect a leak, act swiftly to avoid further complications and potential water damage.
Tools Needed for Effective Outdoor Plumbing Leak Inspection

When it comes to inspecting outdoor plumbing for leaks, the right tools make all the difference. You’ll need a pressure gauge to measure water pressure, which can help pinpoint the source of a leak by identifying sudden drops in pressure. This is especially useful for buried or hard-to-reach pipes. Additionally, pack a flashlight, garden hose, and a notepad for taking notes.
A garden hose can be used to temporarily reroute water flow, allowing you to inspect areas that would otherwise be inaccessible. A flashlight will illuminate dark spaces, revealing any signs of moisture or damage. During your inspection, jot down observations, including locations of potential leaks, unusual noises, or wet spots. These notes will come in handy when diagnosing the problem and planning repairs.
Step-by-Step Guide to Inspecting Your Outdoor Plumbing for Leaks
Step-by-Step Guide to Inspecting Your Outdoor Plumbing for Leaks
1. Turn Off Water Supply: Before beginning your inspection, make sure to turn off the main water supply valve located near your property line or within your home. This will prevent any unexpected water flow during your checkup.
2. Check Visible Pipes and Fittings: Walk along all visible outdoor plumbing, examining pipes, fittings, and valves for any signs of damage, corrosion, or unusual bulges. Leaks often manifest as damp spots or green algae growth around these areas. Keep an eye out for rusted or loose connections, which could indicate poor sealing or pressure issues.
3. Monitor Water Pressure: Use a pressure gauge to check your water pressure before and after turning off the main valve. A significant drop could suggest a leak somewhere in your plumbing system. Compare the reading with the recommended pressure level by your local utility company or manufacturer guidelines for your specific plumbing setup.
4. Inspect Outdoor Faucets and Sprinklers: Turn on each outdoor faucet and sprinkler head individually to check for leaks. Look for drips or continuous flows, even after you’ve turned them off. Examine the gaskets and O-rings for any signs of damage or wear, as these components are common leak points.
5. Examine Underground Pipes (if applicable): If your outdoor plumbing includes underground pipes, locate access points to inspect them. Look for signs of moisture, which could indicate a leak beneath the ground. Consider using specialized equipment like moisture meters for more accurate readings.
Addressing Different Types of Leaks and Maintenance Tips
Addressing different types of leaks is crucial in maintaining efficient outdoor plumbing and preventing water waste. Common leak types include pipe leaks, faucet leaks, and sprinkler system leaks. Pipe leaks often occur due to corrosion or damage from roots infiltrating the pipes. Regular inspection and replacement of old or damaged pipes can prevent these issues. Faucet leaks usually stem from worn-out O-rings or cartridges that require simple DIY repairs or replacements.
Maintenance tips for effective leak prevention include checking water pressure regularly, as high pressure can lead to pipe damage, and keeping an eye on unusual noises coming from plumbing systems. Timely maintenance and swift action upon detecting any leak can save you significant costs related to water damage and waste. Additionally, insulating pipes in cold climates and using weather-resistant fittings can safeguard your outdoor plumbing from freeze damage and other environmental factors.
Preventive Measures to Reduce Outdoor Plumbing Leakage

Regular maintenance is key to preventing outdoor plumbing leaks. Start by inspecting your pipes for any signs of damage, corrosion, or wear and tear. Repair or replace damaged sections promptly to avoid potential leaks. Additionally, monitor water pressure levels; sustained high pressure can strain pipes and fittings, leading to eventual leakage. Install pressure regulators to maintain optimal pressure, thereby reducing the risk of pipe failures.
Other preventive measures include sealing all joints and connections with appropriate sealants, ensuring proper drainage by clearing debris from drains and downspouts, and insulating exposed pipes in colder climates to prevent freezing and bursting. Regular check-ups and timely repairs can significantly reduce outdoor plumbing leakage issues.